The Secret to Growing Endless Fresh Kale All Year Round
The Secret to Growing Endless Fresh Kale All Year Round
If you’re eager to maximize your kale harvest, the solution is simple: cut and come again. This easy technique not only helps you enjoy fresh kale throughout the season but also saves garden space, making it perfect for smaller areas.
Why Cut and Come Again Works
By selectively harvesting the outer leaves of kale gradually, you allow the younger, inner leaves to grow. This approach enables you to enjoy kale for meals over an extended period. Given that kale can grow quite large—up to 30 inches wide and 24 inches tall—this method is particularly beneficial for compact gardening.
When Can You Harvest Your Kale?
One of the first questions many gardeners ask is how soon they can expect to harvest their kale. If you’ve ever craved homemade kale chips, you might be curious about when you can start making them!
- Direct seeded kale is ready for harvest in 55-75 days after sowing.
- Kale transplants can be harvested in 30-40 days.
As long as you leave the terminal bud intact, your kale plants will continue to produce leaves for months. Imagine all the scrumptious stir-fries, salads, and smoothies ahead!
Quick Tips for Growing Kale
Kale (Brassica oleracea) is a versatile garden vegetable. Here are some essential tips:
- Kale prefers partial shade over full sun.
- You can grow it directly in the ground, in raised beds, or in containers.
- Sow seeds indoors about 6 weeks before the last frost to jumpstart your season.
- Kale can be planted in spring or fall.
- It grows well with companion plants like beets, cucumbers, onions, chard, and potatoes.
- Mulching helps retain soil moisture.
With the right care, including managing pests like flea beetles, you can enjoy lush kale leaves throughout the growing season.
Sowing Kale Seeds
If you love kale for its flavor and health benefits, you’re likely excited to begin planting. Kale seeds resemble cabbage or Brussels sprout seeds; keep track of your varieties as they mature.
You can start seeds in containers several weeks before the last expected frost. Once your seeds are ready, plant them about 1/4 inch deep, either indoors or in the garden.
Water Requirements for Growing Kale
To thrive, kale requires consistent moisture. Ideally, provide 1-2 inches of water weekly to prevent wilting, especially when temperatures rise above 70°F.
Mulching with hay, straw, or grass clippings can help maintain soil moisture and suppress weeds.
Preventing Diseases on Your Kale Crop
To keep your plants healthy, avoid stressing them. Regular watering, fertilizing, and weeding are key to preventing diseases.
Practice crop rotation and start with clean soil mixes for the best results. For more details on pests and diseases, check out resources like Gardener’s Path.
Kale Spacing
While it’s tempting to crowd your garden, adequate spacing is crucial. Proper spacing allows plants to develop fully and helps reduce pest problems.
A general rule is to thin seedlings to 12-18 inches apart, with 2-3 feet between rows for ample growth.
Kale Varieties Worth Growing
Kale thrives in cool conditions, making it an ideal choice for various climates. Some notable varieties include:
- Lacinato Kale: Also known as Dinosaur or Nero di Toscana, this variety features heavily savoyed leaves.
- Scarlet Kale: Known for its stunning color, this frost-hardy variety stands out in winter gardens.
- Red Russian: A fast-maturing kale with flat, lacy leaves that thrive in cooler weather.
- Siberian Kale: This variety features large blue-green leaves and is known for its winter hardiness.
- Redbor Kale: Recognized for its tall, dark, and sweet leaves, which gain extra sweetness after frost.
Harvesting Cut-and-Come-Again Kale
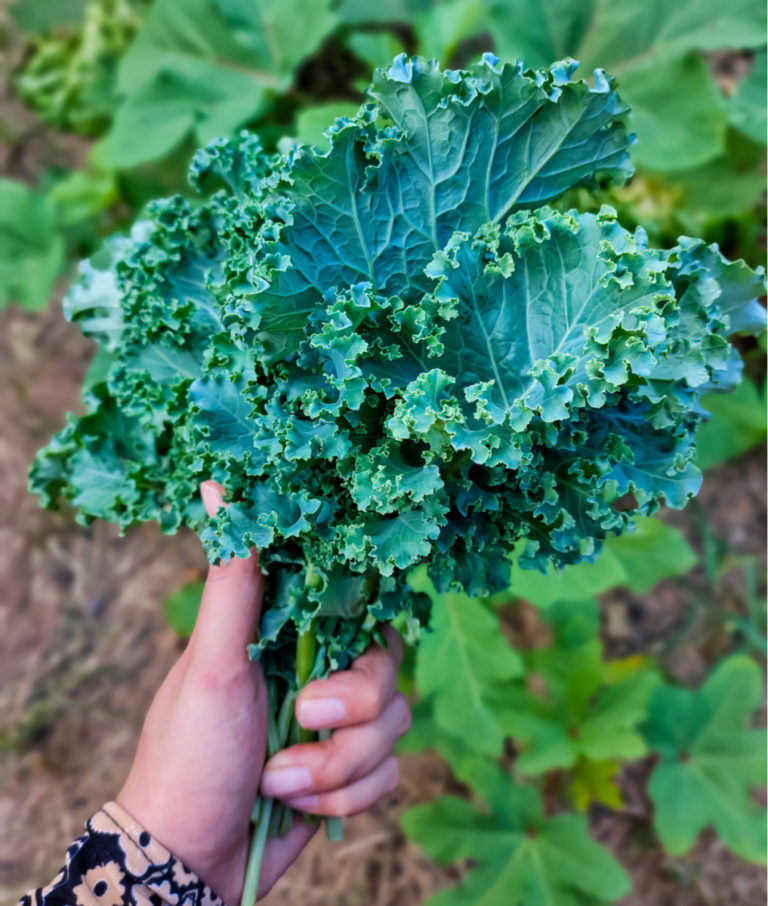
You can enjoy kale from tiny sprouts to mature leaves, extending your harvest across seasons. Remember to harvest only the outer leaves while leaving the center to continue growing.
Keep an eye on the plant; regularly remove yellow or damaged leaves to promote health and yield. By maintaining a routine, you can harvest kale every week.
During hot summers, harvest younger leaves to avoid bitterness due to excessive sun exposure.
Must-Try Kale Chips Recipe
Kale chips are a fan favorite! You can make them in an air fryer or bake them in the oven. Here’s a simple recipe to get you started:
- Preheat your oven to 300°F (150°C).
- Rinse and dry the kale, removing the stems.
- Drizzle with olive oil and massage into the leaves.
- Add your favorite seasonings—salt, garlic powder, or smoked paprika work well.
- Spread the seasoned leaves on a baking sheet and bake for about 10 minutes. Flip and bake for an additional 7-15 minutes until crispy but not burnt.
Let them cool for 5 minutes before enjoying. The beauty of growing your own kale is being able to make these tasty chips as often as your harvest allows!
Conclusion
With the cut-and-come-again method, you can enjoy a continuous supply of fresh kale throughout the year. By following the tips outlined in this guide, from sowing seeds to harvesting, you’ll be well on your way to becoming a successful kale gardener. Happy gardening!