This simple trick removes labels in seconds… leave no residue on your jars!
This Simple Trick Removes Labels in Seconds… Leave No Residue on Your Jars!
Are you tired of struggling with stubborn labels on jars and containers? You’re not alone! Removing labels can often feel like a daunting task, leaving behind annoying residue. Fear not, as this simple trick will help you cleanly remove any label in just seconds. Let’s dive into the step-by-step process that can transform your jar cleaning routine.
Step-by-Step Guide to Effortless Label Removal
What You’ll Need
- Warm Water
- Dish Soap
- White Vinegar
- Sponge or Cloth
- Scissors (if needed)
Step 1: Soak the Jar
Start by filling a bowl or sink with warm water. Add a few drops of dish soap. Submerge the jar for about 10-15 minutes. This helps to loosen the adhesive holding the label in place, making it easier to remove.
Step 2: Wipe Away the Label
After soaking, take the jar out of the water. Gently peel off the label. If it doesn’t come off easily, use your sponge or cloth to rub it in a circular motion. The warm, soapy water should help dissolve the adhesive.
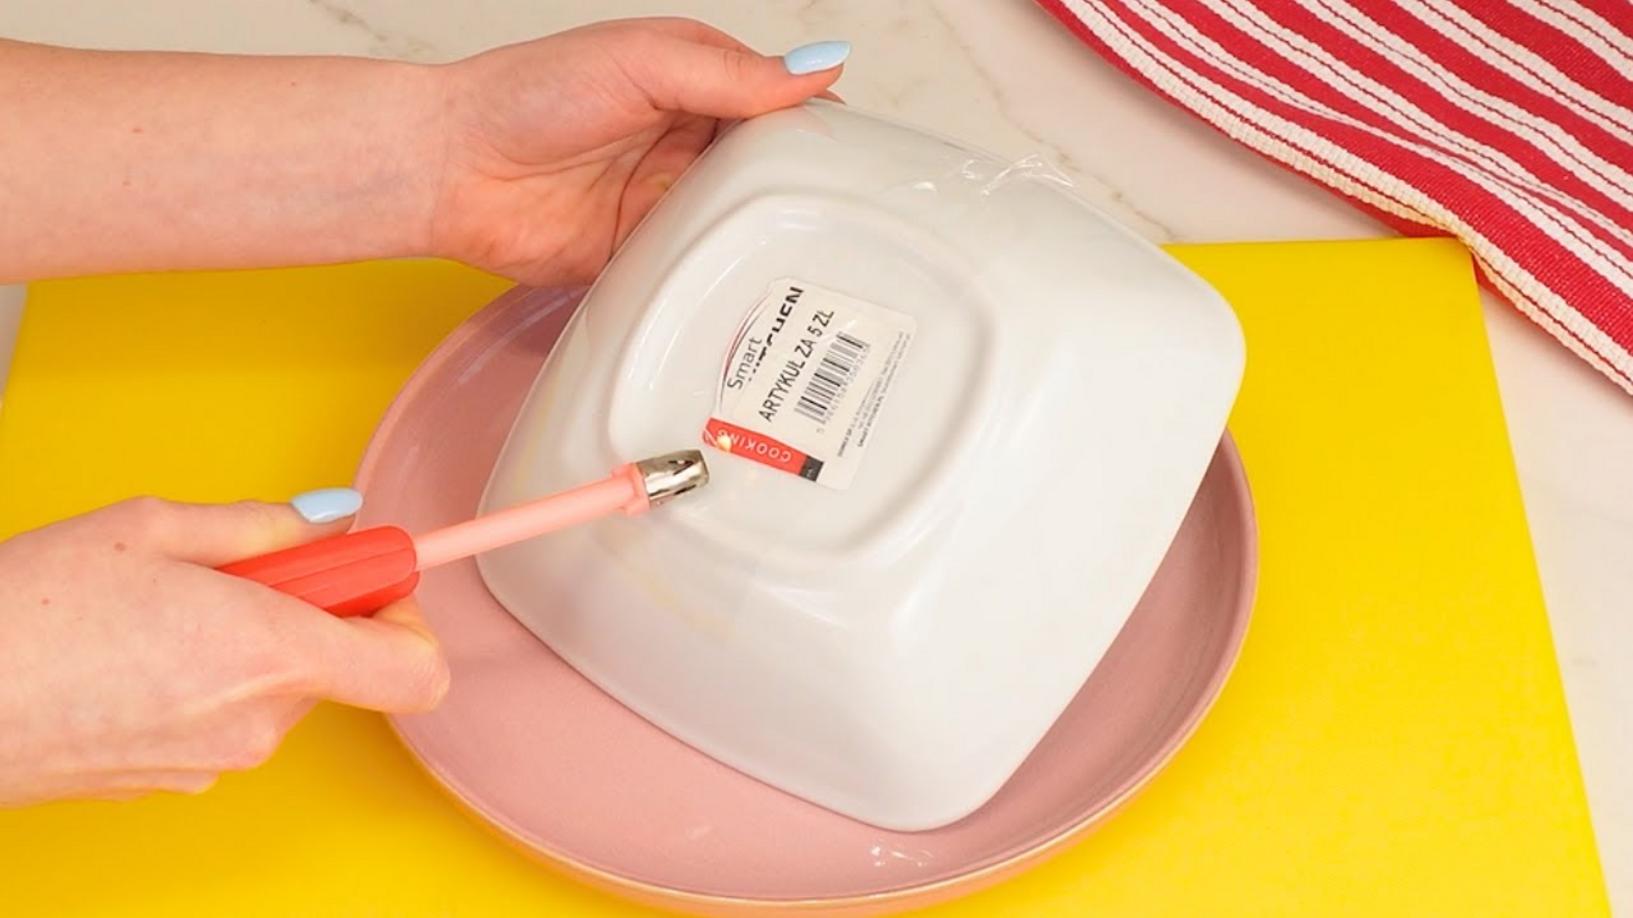
Step 3: Remove Residue with Vinegar
If there’s any sticky residue left, dip your cloth in white vinegar and apply it to the area. Let it sit for a minute before wiping it away. This powerful trick ensures **no residue** stays behind, leaving your jars sparkling clean.
Practical Tips for Success
- Test First: Always test a small area with vinegar to ensure it doesn’t affect the jar’s finish.
- Use a Scraper: If you’re dealing with really stubborn stickers, a plastic scraper can help lift the edges while soaking.
- Fresh Labels: For newly labeled jars, it’s often easier to peel them off before they set.
Common Mistakes to Avoid
- Skipping Soaking: Neglecting to soak the jar can lead to frustration. Always soak first!
- Using Too Much Force: Avoid yanking off the label; this can leave more residue behind.
- Rushing the Process: Patience is key! Allow enough time for the adhesive to break down.
Conclusion: Get Started Today!
Now that you know this simple trick, removing labels will no longer be a chore. By following these steps, you can easily keep your jars looking fresh and clean without any residue. So, gather your supplies and give it a try! Share your successes in the comments below. Happy cleaning, and may your jars be forever label-free!