Build a Wattle Fence from Branches: A Step-by-Step Guide
“`html
Build a Wattle Fence from Branches: A Step-by-Step Guide
Creating a wattle fence is a charming and eco-friendly way to enhance your garden. Using materials that are readily available not only saves money but also reduces your environmental impact. This guide walks you through the steps to build your own wattle fence.
What Is a Wattle Fence?
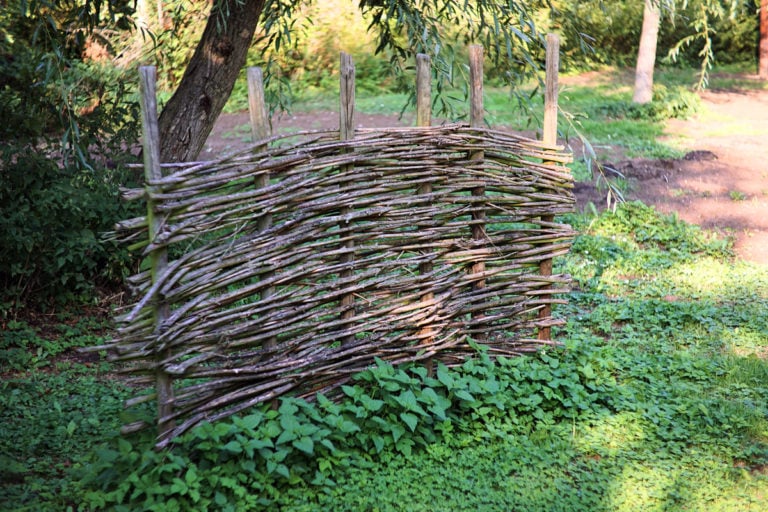
A wattle fence is a lightweight and flexible structure made by weaving thin branches between upright stakes. This traditional British technique dates back to Neolithic times and has been used across Europe to create various types of fencing and enclosures. Wattle fences not only serve as barriers but also play a role in sustainable building practices today.
Why Build a Wattle Fence?
A wattle fence offers multiple benefits, including:
- Marking property boundaries
- Creating attractive divisions between garden areas
- Providing shelter for plants or outdoor seating
- Keeping pets contained and children safe
- Containing livestock effectively
Its versatility makes it a great addition to any homestead.
Which Wood To Choose
Selecting the right wood is crucial for a sturdy fence. Traditional options include:
- Hazel
- Willow
- Alder
Feel free to use a mix of branches from your property, such as elder, ash, apple, and plum. Ensure that the stakes are strong, as they will support the entire structure.
Making Design Decisions
Before building, consider the following:
- Location and length of the fence
- Primary function (decorative or functional)
- Aesthetic preferences (straight vs. curvy designs)
- Desired rustic appearance
Your design choices will affect the fence’s height and sturdiness, so plan accordingly.
A Step By Step Guide To Building Your Wattle Fence
Gather your materials and set aside enough time for this rewarding project. Here’s what you’ll need:
- Wood saw or pruning saw
- Loppers for cutting larger branches
- Secateurs for smaller branches
- Mallet or post-driver
1. Mark Out the Position of Your Fence
Use natural twine, sticks, or flour to outline your fence’s desired location while considering sunlight and wind direction.
2. Gather Your Materials
Collect the number of stakes and branches needed based on the size of your fence. Choose long, pliable branches for weaving.
3. Create and Position Your Stakes
Cut the bases of your stakes to points for easier insertion into the ground. Space them according to your design and secure them vertically using your mallet.
4. Begin Weaving Your Branches Between The Stakes
Start weaving the first branch through the stakes, alternating sides with each new branch. Stagger the starting points to maintain consistency throughout your fence.
5. Continue Weaving Until Your Fence Reaches The Required Height
Weave until your fence is complete or you run out of materials, ensuring to push branches down firmly for stability. Trim any excess branch ends for a neat finish.
Conclusion
A well-built wattle fence can serve you for many years, adding both functionality and charm to your garden. Enjoy the satisfaction of crafting a structure that is both beautiful and sustainable!
“`