Creamy Chocolate Peanut Butter Ice Cream Recipe You’ll Love
Creamy Chocolate Peanut Butter Ice Cream Recipe You’ll Love
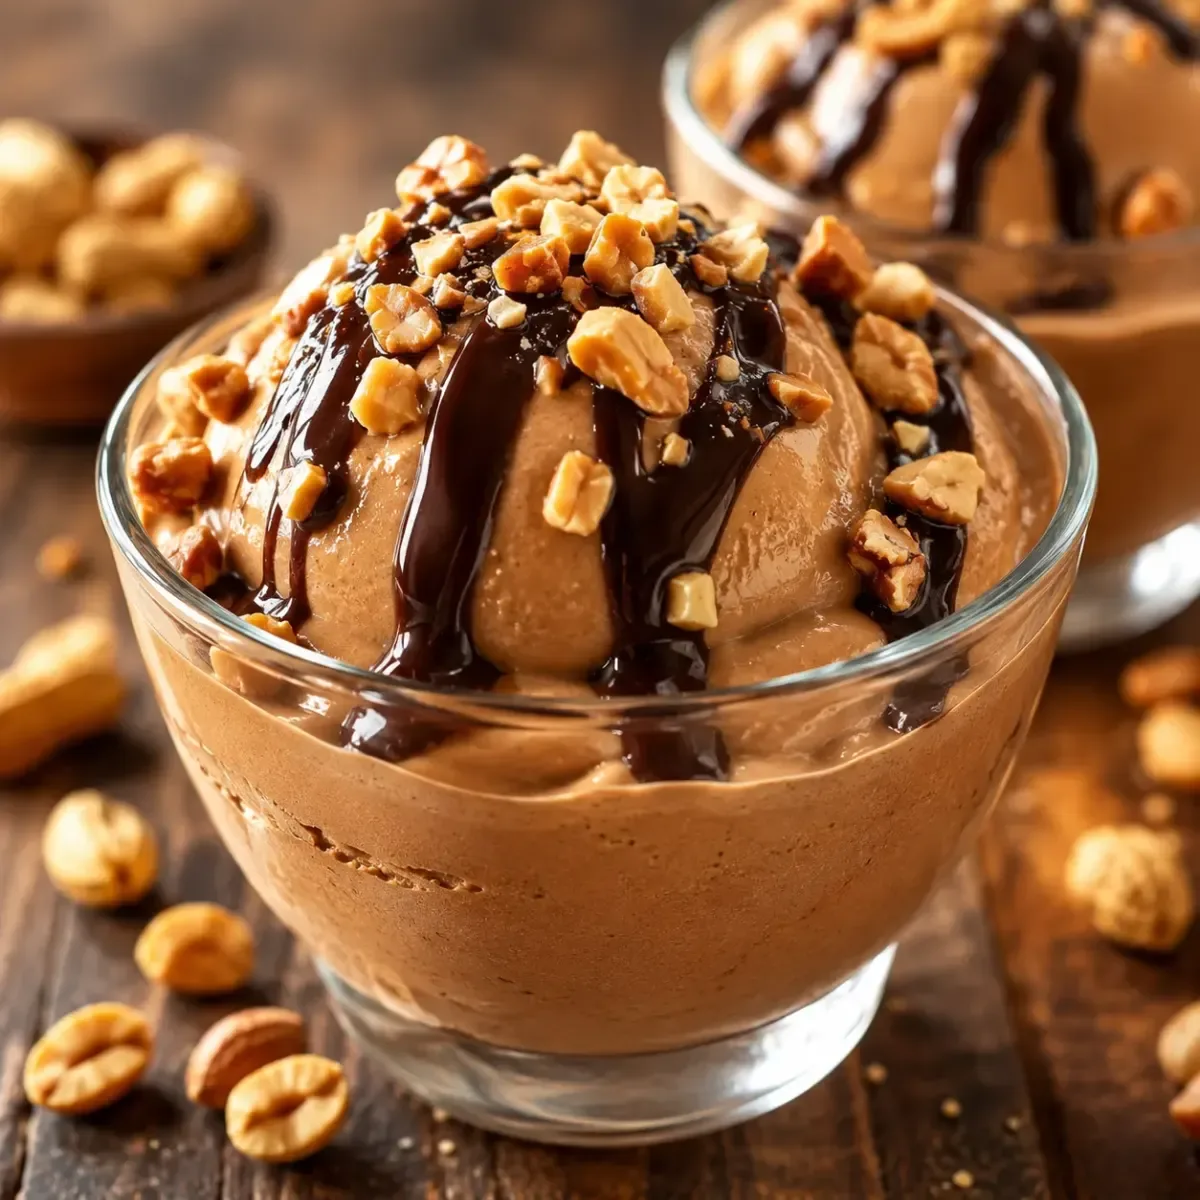
If you’re searching for the ultimate dessert that pleases every palate, look no further! This creamy chocolate peanut butter ice cream marries the intense flavor of chocolate with the rich indulgence of peanut butter, creating a deliciously smooth treat. Perfect for any occasion, it’s made with simple ingredients that deliver a high-quality, artisanal experience right at home.
Why You’ll Love This Ice Cream
You’ll adore this ice cream for its dense and silky texture that’s reminiscent of high-end shops. The deep chocolate flavor beautifully complements the creamy body and addictively rich taste of peanut butter. It’s perfect for summer gatherings, cozy evenings, or satisfying chocolate cravings. Simplicity meets generosity in this delightful recipe, making it a must-have in your freezer.
Quick Recipe Overview
- Dish Type: Frozen Dessert
- Cuisine: Family-Friendly, Gourmet
- Servings: 6 People
- Preparation Time: 20 minutes
- Cooking Time: 8 minutes
- Chilling Time: Minimum 6 hours
- Total Time: Approximately 6 hours 30 minutes
- Difficulty: Easy
- Cost: Moderate
- Calories: Approximately 340 kcal per serving
- Texture: Very Creamy, Soft, Velvety
Ingredients for Ultra-Creamy Ice Cream
For 6 servings, you will need:
- 300 ml heavy cream, very cold
- 250 ml whole milk
- 120 g dark chocolate (60-70% cacao)
- 90 g creamy peanut butter
- 80 g granulated sugar
- 20 g unsweetened cocoa powder
- 3 egg yolks
- 1 tsp vanilla extract
- 1 pinch of fine salt
- 40 g chocolate chips (optional)
- 2 tbsp additional peanut butter for swirling (optional)
Choosing the Right Ingredients
Select high-quality dark chocolate, ideally between 60% and 70% cacao, for the best flavor intensity. A creamy, well-mixed peanut butter is essential; if using natural butter, ensure it’s not too liquid or separated. Heavy cream is crucial for a smooth texture, while whole milk adds sweetness and richness. The egg yolks create a custard-like base, enhancing the stability and texture.
Equipment Needed
- Thick-bottomed saucepan
- Whisk
- Mixing bowl
- Silicone spatula
- Kitchen thermometer (optional but helpful)
- Ice cream maker
- Freezer-safe container
- Plastic wrap or lid
Preparation Steps
1. Prepare the Chocolate Base
In a saucepan, combine the whole milk and heavy cream. Add the sugar, unsweetened cocoa powder, and salt. Whisk to dissolve as much cocoa as possible. Heat over low to medium heat, ensuring it doesn’t boil until it is hot and steaming.
2. Incorporate the Chocolate
Once hot, remove from heat and add chopped dark chocolate. Let it sit for a minute before stirring gently until smooth and shiny.
3. Prepare the Egg Yolks
In a mixing bowl, whisk the egg yolks briefly. Gradually add a ladle of the warm chocolate mixture, whisking continuously to temper the yolks. Repeat with a second ladle, then return the mixture to the saucepan.
4. Cook the Custard
Heat gently over low heat, stirring constantly until the mixture thickens slightly and coats the back of a spatula. Do not let it boil; aim for about 82-84°C (180-183°F). It should remain fluid yet velvety.
5. Add the Peanut Butter
Remove from heat and stir in the peanut butter and vanilla extract until fully combined and smooth.
6. Chill the Mixture
Transfer the mixture to a clean bowl. Let it cool slightly, then cover directly with plastic wrap to prevent a skin from forming. Refrigerate for at least 4 hours, ideally overnight for best results.
7. Churn the Ice Cream
Once thoroughly chilled, pour the mixture into your ice cream maker and churn according to the manufacturer’s instructions, typically for 25-35 minutes until thick and creamy.
8. Add Mix-ins
If desired, fold in chocolate chips at the end of churning. For a swirled effect, layer half the ice cream into the container, drizzle with peanut butter, top with the remaining ice cream, and swirl again with a knife.
9. Freeze Before Serving
Tightly seal the container and freeze for at least 2 hours to firm up before serving. Let it sit at room temperature for 5-10 minutes before scooping for the best texture.
Tips for Success
Your ice cream should be rich and velvety, with no ice crystals. The chocolate color should be deep, and the peanut butter flavor should gradually unfold. When scooped, it should form well-rounded balls without being overly hard.
Chef’s Recommendations for Extra Indulgence
- Use very cold ingredients: Ideally, let the mixture rest overnight to enhance texture.
- Select quality peanut butter: Look for natural options without excessive added sugar.
- Enhance chocolate flavor: Add a teaspoon of espresso powder to amplify the taste.
- Add mix-ins right: Incorporate chips or bites at the end of churning.
- Rest before serving: Allow the ice cream to soften briefly for optimal creaminess.
Common Mistakes to Avoid
- Never let the custard boil, as this will result in curdled eggs.
- Avoid using low-fat cream or skim milk, which affects creaminess.
- Don’t skimp on sugar; it contributes to texture as well as flavor.
- Do not freeze a warm mixture; it will create larger ice crystals.
- Respect the chilling time for a better final product.
Delicious Variations
- Intense Dark Chocolate: Use 70% cacao chocolate and add dark chocolate shavings.
- Milk Chocolate Version: Replace half the dark chocolate with milk chocolate for a sweeter taste.
- Reese’s Style: Fold in mini peanut butter cup pieces at the end.
- Caramel Variation: Swirl in salted caramel for a fantastic flavor contrast.
- Crispy Treats: Add crushed peanuts, cookie chunks, or crispy wafer pieces.
Perfect Pairings
This ice cream pairs beautifully with:
- Warm brownies
- Chocolate chip cookies
- Crispy waffles
- Homemade crepes
- Lightly toasted brioche
- Fresh berry salad
- Caramelized bananas
- Warm chocolate sauce
- Lightly sweetened whipped cream
Storage and Reheating Tips
Your ice cream can be stored for about two weeks in an airtight container in the freezer. To maintain its texture, place a piece of parchment paper or plastic wrap directly on the surface before sealing. Do not refreeze once completely thawed. Let it sit at room temperature for a few minutes before enjoying for the best texture.
Preparing Ahead of Time
This recipe is perfect for making a day in advance. Allow the base to mature overnight in the fridge for heightened creaminess and flavor complexity. You can also create different flavors for a delightful ice cream assortment for dessert buffets.
Approximate Nutritional Values
| Nutrient | Per Serving |
|---|---|
| Calories | 340 kcal |
| Protein | 8 g |
| Fat | 24 g |
| Carbohydrates | 23 g |
| Sugars | 20 g |
| Fiber | 2 g |
| Salt | 0.3 g |
These values are approximate and can vary based on specific ingredients used.
Frequently Asked Questions
- Can this recipe be made without an ice cream maker? Yes! Pour the mixture into a dish and stir vigorously every 30-45 minutes for about 4 hours to limit ice crystals.
- What kind of peanut butter should I use? Choose a creamy peanut butter, ideally made primarily from peanuts.
- Can I use milk chocolate? Yes, it will result in a sweeter ice cream.
- Why is my ice cream too hard? It may have been frozen too long or lacks sufficient fat; let it sit out for a few minutes before serving.
- Can I add chocolate chunks? Absolutely! Chocolate chips or chunks add delightful texture.
- How long does this ice cream last? About two weeks in an airtight container while maintaining great taste.
Conclusion
This creamy chocolate peanut butter ice cream is a rich dessert that combines two beloved flavors in a luxuriously smooth texture. Easy to make with accessible ingredients, it’s suitable for family dinners and special occasions alike. Experiment with your favorite mix-ins and share this treat with loved ones for a delightful experience anytime.